| Exterior How-To's | |
| Interior How-To's | |
| Drying How-To's | |
| Latest Innovations | |
| Ceramic How-To's | |
| Detailing University |
Owning a motorcycle? Yeah, that’s the dream. But if you want to keep it from looking like it’s been through a dirt tornado, regular maintenance is non-negotiable. A shiny bike isn’t just for show—it’s about keeping your ride looking badass and running smooth.
Detailing your bike isn’t just about flexing in the sun; it’s about armor against grime, rust, and Mother Nature’s worst mood swings. Whether your bike is fresh off the lot or has been gathering dust in the garage, a good clean-up will give it that ‘just-rolled-out’ vibe again.
Let’s walk through a complete guide of how to wash, detail, and protect your motorcycle.
Prepare Your Gear
- Two Buckets with Dirt Traps
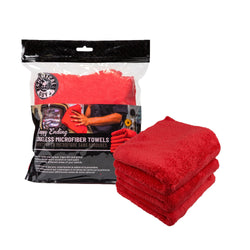
Use one bucket for soapy water and the other for rinsing to avoid contamination. - Microfiber Cloths
Essential for drying and polishing without leaving streaks or scratches. - Wash Mitt
Opt for soft materials to prevent scratching the bike’s surfaces. - Soft-Bristle Brushes
Use various sizes to clean intricate areas without damaging the paint. - Motorcycle-Specific Cleaner
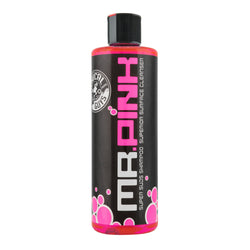
Ensure the cleaner is safe for all surfaces of your motorcycle. We recommend Chemical Guys Mr. Pink. This high-foaming, pH-balanced car wash soap is perfect for motorcycles. It effectively removes dirt and grime without stripping wax or sealant, ensuring a thorough clean while preserving your bike’s finish. - Leather Cleaner
Chemical Guys Leather Cleaner is specifically formulated for delicate leather surfaces, this cleaner gently removes dirt and grime without drying or damaging the leather. Ideal for maintaining motorcycle seats and other leather components. - Degreaser
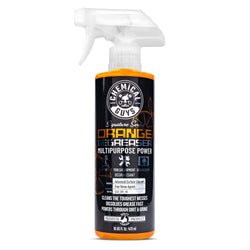
Perfect for tackling engine and chain grease build-up. Chemical Guys Orange Degreaser is powerful citrus-based degreaser that tackles engine grease, chain grime, and other tough contaminants. This degreaser ensures your motorcycle stays clean and protected from buildup, enhancing both appearance and performance. - Chain Cleaner and Lubricant
Especially important for maintaining the chain if the bike has been idle. Motul MC Care C2 Chain Lube Road is a high-performance chain lubricant that provides long-lasting protection against rust and wear. It enhances the performance and lifespan of your motorcycle chain, ensuring smooth and reliable operation. - Chrome or Metal Polish
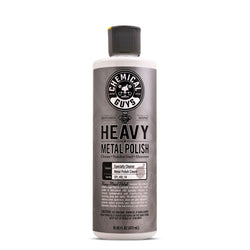
Bring out the shine on chrome or metal surfaces with Chemical Guys Metal Polish, a premium metal polish that restores shine and removes oxidation from chrome and other metal surfaces. Perfect for keeping your motorcycle’s metal parts gleaming and protected from the elements. - Garden Hose with Adjustable Nozzle
Use for thorough rinsing, adjusting the pressure as needed.
If you're eco-conscious, live in an area with water restrictions, or don't have access to running water, consider using waterless car wash products.
Step 1: Prepare the Work Area and Motorcycle

Wash your bike in the shade—unless you’re into soap spots and streaks. Direct sunlight dries that stuff faster than you can scrub it, so give yourself a fighting chance.
Make sure the bike’s surface is cool, too. Hot surfaces? Not your friend. Water and soap evaporate quicker than a cold beer on a summer day, and we don’t need that mess.
If you’ve just finished tearing up the road, let your engine chill out for a bit. Spraying cold water on a hot engine can cause metal components to crack due to thermal shock.
Worried about water sneaking into your exhaust? Shove a rag, rubber plug, or heck, even a plastic glove to protect the exhaust ports. Better safe than soggy!
Step 2: Rinse and Pre-Clean the Motorcycle

Before diving into the sudsy fun, give your ride a gentle rinse. Seriously, a little water love goes a long way. This first rinse will wash away loose dirt, dust, and debris that’ll otherwise turn your bike into a scratch magnet when you start scrubbing. No one wants to drag dirt across that pristine paint, chrome, or plastic and end up with a swirl party.
Zero in on the dirt magnets—the wheels, fenders, and exhaust. Those bad boys collect grime like they’re trying to win a dirt-eating contest, so get them prepped for the real clean-up.
Pro Tip: Ditch the pressure washer. Sure, it looks badass, but that high-pressure blast can wreak havoc on your bike’s delicate parts, like seals, bearings, and electronics. Trust us, costly repairs aren’t nearly as cool as a shiny ride!
Step 3: Wash Using the Two-Bucket Method

Prepare Two Buckets
Get yourself two buckets—because we’re fancy like that. In one bucket, mix up a motorcycle-specific cleaner with water. In the second bucket, fill it with clean water for rinsing your mitt. This two-bucket magic keeps dirt from crashing the party in your soapy water, which means fewer scratches and a whole lot more shine.
Wash from Top to Bottom
Now, dip your wash mitt into that soapy goodness and start at the top of your bike. Work your way down like a pro—straight, gentle strokes only. This way, dirt flows downward instead of re-soiling those shiny spots you’ve already cleaned.
Use a Soft Brush for Intricate Areas
For those tight spots—like around the engine and between spokes—grab a soft brush. Treat your bike with care, though; we’re throwing a clean party, not a scratch party.
Avoid Scrubbing the Chain and Brakes
Let water and soap touch the chain and brakes, but don’t get scrubbing happy... you could wipe away essential lubes or coatings needed for smooth riding. Just give them a rinse and re-lubricate that chain afterward for good measure.
Pro Tip: Got some nasty tar or bugs clinging to your bike like a bad date? Grab some Bug and Tar Remover and make the crud go away.
Step 4: Clean the Motorcycle Wheels

Start by grabbing a degreaser or wheel-specific cleaner that knows how to tackle tough grime without giving your wheels a makeover they didn’t ask for. Spray that cleaner directly onto the wheels and let it sit for a few minutes—think of it as a mini spa treatment for your ride, loosening up all that accumulated dirt and brake dust. Just steer clear of harsh cleaners; we want to keep those rims and spokes looking fresh, not wrecked.
Next up, take a soft-bristle brush or a detail brush and get scrubbing. If you’ve got spoked wheels, you’ll need a brush that can shimmy between those spokes for a proper clean. Don’t skimp on the details—those little crevices love to collect grime.
For those hard-to-reach spots or stubborn grime that just won’t budge, whip out some smaller detailing brushes. They’re like the secret weapon in your cleaning arsenal, ensuring every nook and cranny—especially around the hub, brake discs, and spokes—gets the love it deserves.
Finally, rinse those wheels thoroughly with water. We want all that cleaner and debris gone, leaving your wheels spotless and shining like they just rolled off the showroom floor!
Step 5: Rinse Your Motorcycle Thoroughly

Rinsing your bike properly is non-negotiable if you want to avoid those pesky streaks, water spots, and residue that scream “I didn’t clean my ride!” Grab a low-pressure hose and give your bike a gentle rinse; trust us, high-pressure water is a one-way ticket to damaging sensitive bits like seals, bearings, and electrical components. We want your ride looking good, not wrecked.
Start from the top and work your way down. This way, any dirt or soap sliding down won’t mess up the areas you’ve already rinsed. Be sure to give some love to those hard-to-reach spots—like under the fenders, around the engine, and between the wheels—because that’s where soap and grime love to hide.
Step 6: Dry Your Motorcycle

After rinsing your motorcycle, don’t just let it air dry like a lazy dog. You need to give it a good towel-down to prevent those annoying water spots and the dreaded rust in all those sneaky hidden nooks. Grab yourself a microfiber towel, chamois, or even an air blower to get the job done right.
Microfiber towels are the MVPs here—super absorbent and soft, they’re like a gentle hug for your bike, keeping scratches at bay. They’re perfect for detailed drying and won’t mess with those delicate finishes.
Chamois cloths are another solid choice, soaking up water like a sponge and gliding over large areas without leaving streaks.
If you want to get fancy, air blowers are great for blasting water out of those hard-to-reach spots—think cracks, seams, and around engine parts—without laying a finger on the surface. Less contact means fewer chances for scratches or swirls.
Start drying from the top and work your way down. This way, any drips from above won’t mess up the areas you’ve already dried.
Keep an eye on those tricky pooling spots, like around mirrors, in cracks, under seats, and around engine components. If you let those areas sit wet, you’re just asking for water spots or, worse, rust. So dry it up like you mean it!
Step 7: Lubricate the Chain

After you’ve scrubbed your bike down, it’s time to show some love to that chain of yours! It might’ve lost some vital lubrication thanks to all that water and soap action, so re-lubing is a must to keep things running smoothly.
First up, grab a motorcycle-specific chain cleaner to kick out any grime, dirt, or leftover degreaser from your wash. Don’t rush this part. Get in there and make sure you’re tackling every nook and cranny to evict any unwanted guests.
Once your chain is squeaky clean and completely dry, it’s time to bust out the motorcycle-specific lubricant. This magic potion will shield your chain from wear, cut down on friction, and help prevent that pesky rust. Apply the lubricant evenly all over the chain, giving extra love to those moving parts like rollers and links that need to glide like a dream.
Let that lubricant soak in fully before you hit the road again. Your chain will thank you with a smooth ride and some serious longevity!
Step 8: Polish and Protect
Once your motorcycle is all dried off, it’s time to get your polish on. This step is crucial for not only giving your bike that showroom shine but also for protecting its surfaces from the elements.
If your ride sports leather seats or surfaces, make sure to use protectants specifically designed for vinyl or leather—no one wants a leather disaster. Just be careful not to get any of that protectant on the tire treads or your hand and foot controls, because let’s be honest: nobody likes a slippery ride. Keep it safe and slick!
Paint: Wax and UV Protection

Apply a motorcycle-specific wax or polish packed with UV protection to keep that color vibrant and fend off sun damage like a pro. This magical wax isn’t just eye candy; it also creates a shield against dust, moisture, and other pesky environmental elements trying to ruin your ride. To control overspray, spritz the applicator or cloth generously and then apply to the surface.
Grab a microfiber cloth or applicator and apply that wax with smooth, even strokes—no scribbles, please. Let it chill for about 15 minutes to work its magic, then buff it off with a fresh microfiber towel for a shine that’ll make heads turn. Shine on, you shiny bike!
Chrome and Metal Parts: High-Shine Metal Polish

For your chrome and metal surfaces, grab a metal polish that's specifically made to clean and restore that dazzling shine while warding off pesky oxidation. Chrome has a flair for collecting scratches, water spots, and tarnishing, so regular polishing is a must to keep it looking fabulous.
Tackle it in small sections with a microfiber applicator pad. Just squeeze out a dab of that metal polish and work it in gently but thoroughly—no need to go Hulk on it. Let it haze up a bit, then buff it off with a fresh microfiber towel. Voilà! You’ll be left with a brilliant, mirror-like shine that brings back chrome’s original luster like it just rolled off the showroom floor. Shine on!
Plastic Surfaces: Non-Abrasive Polish

To keep your motorcycle's paint looking as fresh as a daisy, slap on a wax or polish specifically designed for the two-wheeled beauties. Look for one with UV protection to fend off that brutal sun damage that turns vibrant colors into sad, faded memories. Plus, waxing adds a tough layer of defense against the elements—dust, moisture, and all that road grime trying to rain on your parade.
Grab a microfiber cloth or applicator pad and apply that wax in straight, smooth strokes—no swirlies here. Let it chill for the recommended time (around 15 minutes is usually the sweet spot) before you buff it off with a clean microfiber towel. You'll be left with a high-gloss finish that not only protects but also makes your ride shine brighter than your future!
Leather Motorcycle Seats

To keep your motorcycle's leather looking fresh and fabulous, grab a leather cleaner made just for delicate surfaces—because your seat deserves some love, too!
Dab a bit of that cleaner onto a microfiber cloth and gently wipe down the seat to lift away dirt and grime. No need to go all Hulk on it; a gentle touch will do the trick without risking any damage to the leather.
Once you’ve got it clean, slather on a leather conditioner to keep that material moisturized and shielded from the sun's harsh rays and the weather’s wrath. Just remember to test it out on a small, inconspicuous spot first to make sure it plays nice. This little ritual will keep your leather supple, spotless, and ready to ride!
Step 9: Final Inspection

Once you’ve given your ride the royal treatment with polish and wax, it’s time for the grand inspection. Take a close look at your bike to spot any sneaky missed spots and make sure it’s shining like a superstar.
But don't stop there! This is also the perfect opportunity to play detective and check for any mechanical gremlins lurking around. You never know what you might find, so give it a thorough once-over to ensure everything’s in tip-top shape and ready for your next adventure!
Motorcycle Maintenance Tips
Keeping your motorcycle in tip-top shape doesn’t just happen by magic—it takes regular maintenance and some solid cleaning habits. Below, you’ll find some expanded maintenance tips to help your ride stay clean, protected, and ready to hit the road without a hitch. Buckle up for some essential insights to keep your two-wheeled beast purring like a kitten!
Wash Your Motorcycle Every Two Weeks
Washing your bike regularly is like giving it a spa day—essential for banishing grime, dirt, and salt that can corrode those shiny parts. After tackling harsh conditions like rain or mud, a thorough clean becomes a must to fend off any long-term damage. Keep that motorcycle happy and healthy; it deserves it!
Spot Clean After Each Ride
Giving your motorcycle a quick wipe-down after each ride is like a high-five for your bike—keeping dirt buildup at bay and saving you from those dreaded deep-cleaning sessions. Hit up the tank, wheels, and headlights, and you'll keep your ride looking sharp and ready for the next adventure.
Store Your Motorcycle in a Garage or Cover It
Shield your bike from the sun's harsh rays, unexpected rain, and pesky dust bunnies by tucking it away indoors or throwing on a breathable cover. This little act of protection will keep your ride from fading, rusting, and suffering all sorts of elemental drama.
Regularly Clean and Lubricate Your Chain
Give your chain some love by cleaning off the grime regularly and slapping on some lubricant to keep things slick and rust-free. This routine not only keeps your ride performing like a dream but also extends the life of your chain and sprockets—because nobody wants to be stranded with a rusty old chain.