| Exterior How-To's | |
| Interior How-To's | |
| Drying How-To's | |
| Latest Innovations | |
| Ceramic How-To's | |
| Detailing University |
Water spots: the ultimate party crashers for your car's shine. Not only are they downright ugly, but over time, they can dig into your paint, glass, and chrome-like unwelcome houseguests, leaving behind permanent damage. Yikes.
Whether it’s from sprinklers, surprise rain showers, or (gasp) skipping the drying step after washing—don’t worry, we won’t tell—these spots can wreck your car’s finish. (We know you wouldn't forget to dry... right?)
But there’s hope! You can restore your car’s showroom shine with the right tools and techniques. This step-by-step guide will show you how to kick those stubborn water spots to the curb for good.
Prepare Your Gear
Before you go to war on those pesky water spots, gear up like a detailing mercenary. Here's your arsenal:
- Speed Wipe Quick Detailer
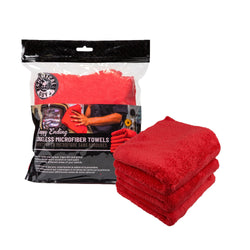
Your first responder for light surface grime and recent water spots. A synthetic superhero for a quick cleanup. - Happy Ending Edgeless Microfiber Towel (3-Pack)
Plush, edgeless, and ridiculously soft—these towels are here to wipe and buff without leaving a scratchy mess behind. - Clay Luber
The perfect sidekick to your clay bar, ensuring a smooth glide across your car’s surface without so much as a squeak. - OG Clay Bar
The OG for a reason! This bad boy removes embedded contaminants and leaves your paint feeling smoother than a freshly waxed surfboard. - Heavy Duty Water Spot Remover
A calcium-busting gel ready to dismantle stubborn mineral deposits like a pro. - Premium Grade Microfiber Applicators
Apply your spot remover evenly and safely—no scratches, no streaks, just perfection.
Step 1: Start With a Clean Surface

- Prep the Surface
Make sure your car’s exterior is free from loose dirt and debris to avoid scratches. - Spray It Down
Grab your Speed Wipe Quick Detailer and lightly spray the area you’re targeting. This product is your go-to for tackling light grime and fresh water spots with ease. - Wipe Like a Pro
Take a Happy Ending Edgeless Microfiber Toweland fold it into quarters. Gently wipe the sprayed area using one side of the towel. Once it’s dirty, flip to a clean side and keep going! - Work Small Sections
Focus on one area at a time. Don’t let the product dry on the surface for the best results.
Pro Tip: Always detail in a shaded area to prevent streaks and new water spots caused by quick drying.
Step 2: Clay the Area (Optional but Recommended)

- Assess the Surface
Run your fingers gently over the paint. If it feels rough or gritty, it’s time to use a clay bar to remove those embedded contaminants. - Lubricate Generously
Spray a generous amount of Clay Luber onto both the car’s surface and your OG Clay Bar. Proper lubrication is key to preventing scratches during this process. - Glide, Don’t Grind
Hold the clay bar and glide it back and forth in straight lines—never in circles. This ensures contaminants are safely lifted without marring the paint. - Keep It Fresh
As you work, knead the OG Clay Bar frequently to reveal a clean section of the bar. Always keep the area you’re working on well-lubricated. - Wipe It Down
Once the area is smooth, use a clean Happy Ending Edgeless Microfiber Towel to remove any excess lubricant. Your paint will now feel silky smooth and be ready for the next step.
Pro Tip: Want more in-depth instructions? Check out our guide: How to Clay Your Car.
Step 3: Obliterate Those Ugly Water Spots

Now it’s time to attack those water spots!
- Load Up Your Applicator
Squeeze 4–5 small dabs of Heavy Duty Water Spot Remover onto Premium Grade Microfiber Applicators. The microfiber ensures an even application without scratching the surface. - Dab, Then Work It In
Dab the spot remover onto the affected area, then use straight, linear motions to work it into the surface. Avoid circular motions to prevent swirl marks on your paint. - Give It Time to Work
Allow the gel to sit on the surface for no more than 30 seconds. This lets the active ingredients break down those stubborn calcium deposits effectively, without the risk of drying. - Cool Surface, Better Results
Always work on a cool, clean surface to prevent streaking or uneven results.
Pro Tip: Want to ensure you're doing it right? Use a microfiber towel to wipe away residue immediately after the gel has done its job, revealing a spot-free, polished finish!
Step 4: Neutralize and Clean

After treating the water spots, it’s essential to neutralize and clean the area.
- Spray It Down
Grab your Speed Wipe Quick Detailer and spray it generously onto the treated section. This step neutralizes the Heavy Duty Water Spot Remover, ensuring no residue lingers. - Wipe Clean
Using a fresh Happy Ending Edgeless Microfiber Towel, gently wipe the area clean. Work methodically to pick up all leftover product and deposits. - Buff for Brilliance
Flip your microfiber towel to a clean side and lightly buff the surface. This leaves the paint smooth, shiny, and perfectly prepped for any protective coatings or waxes you plan to apply.
Why This Step Matters:
Neutralizing and cleaning ensures your car's surface is free from residue, preventing potential damage and setting the stage for maximum protection and shine!
Wrap-Up: A Spotless Finish Awaits
By following these straightforward steps, you can banish those stubborn water spots and bring back your car’s dazzling shine. Consistent maintenance and protective measures not only keep your car looking showroom-fresh but also safeguard its surface from future damage.
So, grab your tools, roll up your sleeves, and get ready to enjoy a water-spot-free, gleaming ride.
Happy detailing!
Frequent Questions About Removing Water Spots
Can I use the Heavy Duty Water Spot Remover on glass?
Absolutely! Heavy Duty Water Spot Remover is safe to use on glass, making it perfect for tackling water spots on your windshield and windows. However, avoid using it on tinted windows to prevent any potential damage to the tint film. Always test on a small area if you're unsure.
Do I need to use my OG Clay Bar every time I remove water spots?
Nope. Only use the OG Clay Bar when your car's paint feels rough to the touch. This indicates embedded contaminants that regular washing can't remove. Overusing the clay bar on smooth surfaces isn't necessary and may risk unnecessary wear on your paint. Always let your car's texture guide you!
What if the water spots don’t come off?
If stubborn water spots remain after following these steps, you may need to repeat the process or consider polishing. Polishing can help remove deeper imperfections and restore your car’s finish. For guidance, check out our How to Choose the Right Compound or Polish article to find the perfect solution for your needs.
How often should I protect my car after removing water spots?
For long-lasting protection, make sure to apply wax or sealant every 3-6 months. This will keep your car’s finish looking fresh and shielded from contaminants. Check out our entire Chemical Guys Protection Collection to find the perfect products for your ride.
Will this process remove ceramic coatings?
No, a true ceramic coating will remain intact when using this method. Just be sure to follow the recommended maintenance for your coating to keep it performing at its best!
Can I remove water spots on my shower glass with Heavy Duty Water Spot Remover?
Yes! Heavy Duty Water Spot Remover can be useful around the house for removing hard water stains on glass, faucets, and shower doors. Just make sure to use it in well-ventilated areas and follow up with a wipe-down to avoid streaks.