| Exterior How-To's | |
| Interior How-To's | |
| Drying How-To's | |
| Latest Innovations | |
| Ceramic How-To's | |
| Detailing University |
A clean engine bay isn't just eye candy for car nerds—it helps you spot pesky leaks or failing parts before they ruin your day. Letting grime pile up can lead to nasty stuff like corrosion, which messes with your car's mojo and shortens its lifespan.
Regular engine bay scrubs are key to running your ride smoothly and safely. Think of it as an "internal car wash" that kicks out gunk hiding in air intakes, gaskets, and other sneaky spots.
Ready to make your engine sparkle? Just follow these easy steps and get your engine bay gleaming like new.
Choose the Right Day for Cleaning Your Engine
For the best results, pick a warm, low-humidity day with a gentle breeze. This way, your engine and its parts will dry off faster, leaving you with a sparkling clean bay in no time.
Prepare Your Gear
- Pressure washer or garden hose
- Microfiber towels
- Plastic bags to cover sensitive components
- Degreaser
- Soft-bristle brushes
- VSS polish
Make Sure Your Engine is Cool
If your car's been running, let the engine cool down first. Splashing liquid on a hot engine can spell disaster thanks to the rapid temperature change. Trust us, you don't want to see what happens next.
Step 1: Disconnect Car Battery and Remove Covers

First, disconnect the negative terminal of your car battery—put a small plastic bag around them and tie it off to keep them safe. Then remove the battery.
Then, ditch those plastic covers to give yourself a clear shot at cleaning all the nooks and crannies.
Step 2: Cover Sensitive Components

First things first: protect your sensitive engine parts from water damage. Start by draping a microfiber towel over them, then double up with a plastic bag for extra security.
Sensitive components to cover include:
- air intake
- alternator
- distributor
- battery
- battery terminals (which you should've done in the last step)
Step 3: Rinse Loose Dirt, Grime and Remove Loose Debris

Use a pressure washer to rinse off the dirt and grime and remove loose debris to prep for a thorough clean.
If you don't have a high-pressure attachment, a garden hose will do, but it's not ideal.
Keep at least a foot away from delicate parts to avoid any accidental damage!
Step 4: Apply Engine Degreaser

Generously spray a degreaser such as All Clean+ All Purpose Cleaner & Degreaser over the entire engine compartment. Make sure every inch has been covered. Allow it to sit at least 15-30 seconds to begin penetrating.
Step 5: Scrub Away the Grime and Clean Surfaces

For those stubborn, grimy spots, grab a soft brush and work that degreaser into the caked-on gunk—valve covers are a good place to start.
For big, flat surfaces, the Wheel and Rim Flagged Tip Brush will get the job done.
For those tricky, hard-to-reach nooks, use the Red Rocket Brush—flexible, bendable, and ready to conquer any tight spot.
And for the fine details, the Boar’s Hair Brush is your go-to, perfect for those tiny spaces where the bigger brushes just can’t reach!
Step 6: Rinse with Care

After scrubbing every nook and cranny, rinse off the leftover product and grime with your garden hose or a low-pressure setting on your pressure washer.
Step 7: Dry the Engine Bay

Grab a premium microfiber towel to dry off the surfaces and soak up any leftover water.
If you’ve got compressed air on hand, blow out the water from those hard-to-reach spots for a final touch.
Step 8: Add Shine

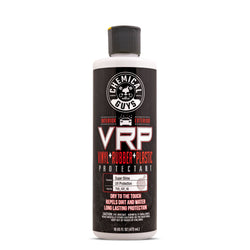
Finish up by slathering on a water-based dressing like VRP to give your engine bay a deep, black shine!
Step 9: Reconnect and Finish Up

Reattach the car battery terminals and remove the protective coverings from the electrical components.
Your engine bay is now sparkling clean and ready to hit the road!
Engine Safety Check
Cleaning your engine is the perfect chance to inspect those hidden parts you rarely see.
Dive into the drivetrain, suspension, braking, and structural components to catch any issues before they turn into big problems—like finding yourself stranded in the middle of nowhere!
- Prevent accidents by checking the throttle for smooth action, and making sure all hoses and lines are intact and free from cracks.
- Keep an eye out for loose bolts, and frayed belts, and check your harnesses and safety restraints.
- Check for leaks and spot coolant and oil leaks early to save your engine, and replace a strut instead of a leaky fork seal to make your landings smoother and safer.
Keep your ride clean and in top shape to ensure it's always ready for action, every single detail!
Maintaining Your Clean Engine Bay
To keep your engine bay looking fresh longer, make regular checks and cleanings part of your vehicle maintenance routine—ideally every 6 months, depending on your driving conditions.
Here are some habits to help prevent future buildup:
- Park in a garage or use protective covering to shield your engine bay.
- Have a regular cleaning schedule to keep grime from settling in.
- Opt for professional detailing services if you're short on time.
These steps will keep your engine bay cleaner and your ride ready for action!
And that’s a wrap, folks!
So there you have it—a clean engine bay isn’t just about making your ride look good; it’s about keeping it in beast mode. Treat it like a VIP spa session: scrub, rinse, and pamper those engine parts like they’re royalty. And remember, a clean engine bay is a happy engine bay—no one wants their car to be a greasy mess on the road. Get in there, get it done, and drive away knowing your engine’s not just clean, but ready to conquer the asphalt like a champ.
Common Questions about Cleaning Your Engine Bay
Is it safe to spray your engine with water?
Spraying your engine with water can be a splashy idea, but it’s gotta be done right. Here’s how to avoid turning your engine into a water park disaster:
- Cool It: Let the engine chill out before you unleash the hose. Hot engines and cold water are like mixing lava with ice—total chaos.
- Avoid the Electronics: Wrap sensitive electrical parts in plastic or foil. You don’t want to turn your engine bay into a waterlogged mess that shorts out your ride.
- Low Pressure Only: Use a garden hose or a low-pressure setting. High pressure might blast water into places it doesn’t belong—like your air intake or your fuel system.
- Dry It Up: After your rinse, dry off with a microfiber towel and, if you’ve got it, blow out the water from those sneaky crevices with compressed air. No one likes a soggy engine.
- Engine-Safe Stuff: Use a degreaser made for engines. Regular cleaners can be like giving your car a chemical bath—harsh and nasty.
Stick to these tips, and your engine will stay clean and dry, not a soggy mess waiting to happen!
Can I use dish soap to clean my engine bay?
Using dish soap to clean your engine bay is like using a butter knife to do brain surgery—it's not ideal, but it might work in a pinch. Here’s what you'll need to do:
- Mild Cleaning: Dish soap is pretty gentle and won’t be as harsh as some other cleaners, but it’s not formulated for engines. It might not cut through all the grime as effectively.
- Rinsing Issues: Dish soap can leave a residue if not thoroughly rinsed off, and that residue can attract dirt or potentially damage your engine components over time.
- Better Alternatives: Engine degreasers and specific car-cleaning products are designed to handle the tough stuff without leaving behind unwanted residue or causing damage.
If you’re in a bind and need something quick, dish soap can do the job, but for a thorough and safe clean, sticking to products made for engines is your best bet.
Can I use WD-40 to clean my engine bay?
Ahh WD-40, the Swiss Army Knife of products; not always the best tool but a helpful hand in getting where you want to go. WD-40 can be handy for loosening stuck parts or preventing rust, but for cleaning your engine bay, stick with products designed for that purpose.
Is it safe to pressure wash a car engine?
Pressure washing a car engine is like bringing a bazooka to a water balloon fight—it's powerful but needs to be used wisely. Long answer short, yes BUT use low pressure and prep carefully to avoid disaster.
How often should I clean my engine bay?
Cleaning your engine bay is like treating your car to a spa day—it needs regular TLC to stay in top shape. Aim to give it a good scrub every 6 months. This routine keeps buildup at bay and helps you catch any issues before they become headaches. If your car spends time in dusty environments, near the beach with salty air, or in heavy rain, you might want to up the frequency and clean it more often.


