| Exterior How-To's | |
| Interior How-To's | |
| Drying How-To's | |
| Latest Innovations | |
| Ceramic How-To's | |
| Detailing University |
Waxing your car is one of the best ways to keep it looking stunning and well-protected. Regular waxing doesn’t just amp up the shine and vibes of your ride; it also throws down a solid shield against UV rays, dirt, and moisture.
In this all-in-one guide, we’ll break down every step, from the prep game to nailing that pro-level showroom shine. Get ready to learn the secrets of car care that will make your vehicle look its absolute best.
When it comes to car care, Chemical Guys is the real deal. We're the experts who know all the ins and outs of making your ride look its best. Our products and tips are gospel, designed to keep your car shining like a boss and protected from all the nasty stuff out there.
Trust us, we've been in the game long enough to know what works, so when we drop information, you know it's legit.
Listen up, and let’s get your car looking next-level.
How to Choose the Right Car Wax Product
Choosing the right wax for your car is a game-changer. You've got three main types to pick from — spray, liquid, and paste — each bringing its own perks and quirks.
Spray wax is super easy to use, perfect for keeping that gloss poppin' between full waxing sessions, but it doesn’t last as long. Liquid wax strikes a sweet balance of shine and protection, spreading evenly and lasting longer than spray. Paste wax might need more elbow grease, but it delivers a deep, killer shine and top-tier long-lasting protection.
Types of Car Wax
Spray Wax: Pros
- Quick and easy to apply.
- Perfect for regular maintenance and touch-ups.
- Works on wet or dry surfaces.
- Leaves a smooth, streak-free finish.
Spray Wax: Cons
- Less durable than other wax types.
- Needs more frequent reapplication.
- Offers lighter protection and shine compared to paste and liquid waxes.
Liquid Wax: Pros
- Applies smoothly and evenly.
- Provides good shine and protection.
- Can be applied by hand or with a buffer.
- Offers better durability than spray wax.
Liquid Wax: Cons
- Requires more effort than spray wax to apply and remove.
- May leave residue if not applied evenly.
- Typically more expensive than spray wax.
Paste Wax: Pros
- Offers deep, rich shine and excellent protection.
- Provides a durable protective layer of wax.
- Suitable for use in various weather conditions.
- Long-lasting protection against contaminants and UV rays.
Paste Wax: Cons
- Requires more time and effort to apply and remove.
- Can be challenging to apply evenly, especially in colder temperatures.
- Generally more expensive than spray and liquid waxes.
Car Wax Products Recommendations
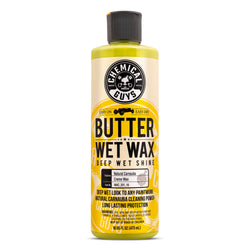
For an all-around wax, you can't go wrong with Chemical Guys Butter Wet Wax. It's a hit with car enthusiasts for its effortless wax application, deep wet-look shine, and solid protection. This high quality wax works wonders on various paint finishes and colors, giving a glossy finish while shielding against UV rays and contaminants. Its buttery smooth application and pleasant scent make it a fan favorite, perfect for anyone seeking a reliable wax with consistent results.
Pair it with these complementary Chemical Guys products:

Chemical Guys Microfiber Towels
High-quality microfiber cloths are essential for buffing off car wax and achieving a streak-free shine.

Chemical Guys Hex-Logic Foam Applicator Pads
These pads are ideal for applying car wax evenly and smoothly without causing scratches.

Chemical Guys VSS Scratch and Swirl Remover
Use this product before waxing to eliminate light scratches and swirl marks, ensuring a smooth surface for wax application.

Rinse & Renew Clay Block & Clay Luber Kit Bundle
A clay bar removes any embedded contaminants and smooths out the surface area. Luber is essential for clay bar usage.

Chemical Guys Synthetic Quick Detailer
This detailer can be used after waxing to enhance gloss and maintain the waxed finish between washes.

Chemical Guys JetSeal Sealant and Paint Protectant
For additional protection, consider using a sealant like JetSeal after waxing to provide long-lasting protection against the elements.
Step-By-Step Guide for Waxing a Car by Hand
Step 1: Prepare to Wax

Prepare the Car
Start by giving your car a thorough wash with a quality car wash soap to get rid of dirt, grime, and old wax. Rinse it well and make sure to dry the car completely.
Inspect the Paint
Take a close look at the paint surface for any lingering contaminants or imperfections. If needed, use a clay bar or Chemical Guys VSS Scratch and Swirl Remover to smooth out the paint and ensure a flawless finish.
Step 2: Apply the Wax

Apply Butter Wet Wax
Shake the bottle of Chemical Guys Butter Wet Wax well before use.
Pour a small amount of wax onto the Hex-Logic Foam Applicator Pad. A little goes a long way for covering each section of your car.
Section-by-Section
Start waxing from the top of the car and work your way down.
Using light pressure, apply the wax in circular motions to a small section of the car (about 2x2 feet).
Ensure even coverage, and slightly overlap each pass to avoid missing any spots.
Step 3: Allow the Wax to Dry to a Haze

Let the Wax Haze
Allow the wax to haze over for a few minutes. It’s like giving your car a little spa break. The time can vary depending on the weather, but typically 5-10 minutes should do the trick. Just enough time to grab a drink and admire your handiwork!
Step 4: Buff Off the Wax with Clean Microfiber Cloths

Buff Off Excess Wax
Grab a clean, dry microfiber towel and gently buff off the hazed wax. Use firm but gentle pressure, and fold the towel to a fresh side as needed—no point in spreading the wax back on!
Repeat Previous Steps
Keep the wax party going, section by section, until your whole car gets that stunning glow-up.
Final Touches
Give your car a once-over under different lighting conditions. Make sure you didn’t miss any spots and say goodbye to any leftover wax residue. Time to bask in that glossy perfection!
Step-By-Step Guide for Waxing with a Machine Polisher
Step 1: Apply the Wax to the Applicator Pad on the Buffer

Prepare the Car
Give your car a thorough wash with a good car wash soap to banish dirt, grime, and old wax. Rinse it off and make sure to dry it completely—no water spots here!
Inspect the Paint
Take a good look at your paint for any lingering contaminants or imperfections. If needed, break out the clay bar or Chemical Guys VSS Scratch and Swirl Remover to get that paint silky smooth.
Prepare the Polisher
Attach a clean foam polishing pad to your dual-action polisher. Make sure it’s securely attached and perfectly centered on the backing plate. You don’t want any wobbles!
Apply Butter Wet Wax
Shake up that bottle of Chemical Guys Butter Wet Wax like you mean it.
Apply 3-4 dime-sized drops of wax evenly spaced onto the foam pad. Time to get that showroom shine!
Step 2: Spread the Wax on the Car Surface

Spread Wax on Low Speed
Before firing up the machine polisher, use the pad to spread the wax over a small section of the car. This keeps things tidy and prevents splatter—no one wants wax flying everywhere!
Set the Polisher
Dial the polisher to a low-speed setting (around 3-4 on most models) to apply wax evenly over the paint surface. Let's get that shine spreading smoothly!
Step 3: Turn on the Buffer and Apply Wax in Circular Motions

Place the foam pad flat against the paint surface and turn on the polisher.
Move the polisher in overlapping passes, applying light to moderate pressure. Work in a grid pattern, covering a small section at a time (approximately 2x2 feet).
Step 4: Let the Wax Haze
Allow the wax to haze over for a few minutes. This time may vary depending on environmental conditions, but typically 5-10 minutes is enough.
Step 5: Buff Off the Wax

Use a clean, dry microfiber towel to gently buff off the hazed wax residue. Fold the towel to a clean side as needed to avoid reapplying any wax.
Special Considerations
Waxing a Black Car
Black paint loves to show off every swirl mark and scratch like it's got something to prove. These pesky imperfections can pop up from dodgy washing techniques, hasty drying, or even past wax mishaps. If you want that mirror-like finish, you need to tackle these flaws before you even think about waxing.
Go for a wax made for dark or black cars, like Chemical Guys Black Light Hybrid Radiant Finish. These bad boys are packed with special polymers and additives that pump up the depth and gloss of black paint while hiding those minor imperfections. Because your car deserves to look as smooth and sleek as possible.
Be sure to check out the Black Car Care Kit which combines everything needed to maintain the perfect show-winning shine on any black car.
Waxing Matte Paint
Matte paint is all about that sleek, flat finish—no gloss, no shine, just smooth vibes.
No Wax Zone: Traditional waxes and polishes? A big no-no for matte paint. They’ll slap unwanted shine all over your sleek look.
Specialized Products Only: Stick with products made for matte finishes, like matte paint sealants or matte detailing sprays that clean and protect without messing with that coveted matte appearance.
Gentle Touch: Matte paint is a scratch magnet. Use gentle washing techniques and microfiber towels to keep it smooth and scratch-free.
Waxing Satin Paint
Satin paint is that perfect middle ground—more sheen than matte but not blindingly glossy. It’s got a subtle, smooth shine.
Moderate Gloss Boost: Satin paint can handle a bit of light polishing or waxing to enhance its gloss without turning it into a full-blown shine fest.
Non-Abrasive Only: Go for non-abrasive polishes and waxes to keep that satin finish intact. Avoid heavy polishing compounds and aggressive buffing—your satin paint will thank you.
Waxing Metallic Paint
Metallic paint is all about the sparkle—tiny metallic flakes that shimmer and shine under the light. It ranges from a subtle glimmer to a full-on disco ball.
Make Those Flakes Pop: Use polishes and waxes specially formulated for metallic finishes to bring out the depth and dazzle of those metallic flakes.
Regular TLC: Metallic paint shows swirls and scratches more easily. Regular washing and waxing will keep that shine popping and protect against pesky contaminants.
Clear Coat Care: Most metallic paints have a clear coat layer. Make sure to double double-check that whatever products you use are clear and coat-safe to avoid any damage or discoloration.
Environment
Avoid waxing under direct sunlight or on a hot surface. Unless you’re aiming for a new look called “permanent wax residue” or enjoy the thrill of wrestling with wax that’s dried faster than you can say “oops,” keep your waxing sessions in the shade or on a cool surface. Your car—and your sanity—will thank you!
Protecting Trim from Wax
If you’re dealing with wax residue near edges or trim, grab some masking tape and slap it along those edges. It’s like giving your trim a protective shield so you don’t accidentally wax where you shouldn’t.
For the residue wax removal magic, use a detailing brush or cloth dampened with IPA or detailing spray. Gently wipe away the wax without messing up the surrounding surfaces—think of it as a delicate dance of cleanliness.
Carefully peel off the masking tape once you’re done. Your trim should be spotless and residue-free.
Removing Wax from Trim
If you do get wax on your trim, follow these steps to remove it:
- Spray some detailing spray or quick detailer directly onto the waxed trim.
- Grab a clean microfiber towel and wipe away the wax residue.
- Repeat as needed until your trim is clean and looking sharp.
Maintenance Between Waxes
Regular waxing isn’t just a luxury—it’s crucial for keeping your car looking its best. Think of it as giving your ride a regular spa day.
If you haven’t started waxing yet, now’s the time to dive in! It’s the key to maintaining and boosting your vehicle’s appearance. Aim to wax your car every 3-6 months. This keeps that shine popping and provides ongoing protection.
Between waxing sessions, use a detailing spray or quick detailer to keep your car looking fresh. It’s like a mini touch-up that keeps the sparkle alive and helps you avoid a major shine overhaul.
That's All There Is To It
And there you have it, folks! You’ve just mastered the art of waxing your car like a pro. Your ride is now looking fresh, shiny, and protected against the elements. Give yourself a pat on the back and take your car for a spin to show off that glossy finish. Remember, regular waxing keeps your car looking fabulous and helps maintain its value. So keep that car wax handy and make it a part of your car care routine.
Until next time, happy detailing and may your car always shine bright!
Common Questions about Car Wax
What is a highly recommended car wax for regular use?
For regular use, Chemical Guys Butter Wet Wax is an excellent choice. It is well-regarded for its ease of wax application and removal, making it suitable for frequent use to maintain your vehicle's shine and protection.
What does wax do for a car?
Quick Touch-Ups: Ideal for quick waxing sessions to refresh and maintain the car's appearance.
Great Shine: Delivers a deep gloss and rich shine that enhances the vehicle's look.
Durability: Offers good protection and durability, keeping the car looking clean and shiny between more intensive detailing sessions.
Will waxing my car remove scratches?
Unfortunately, car wax itself cannot remove scratches. However, it can help mask or fill in very light surface scratches, making them less noticeable. For severe scratch removal, you will need to use other products and techniques.
What happens if I don't wax my car?
If you wash your car but skip the waxing, you’re missing out on crucial protection for your vehicle's paint. Without a wax protective layer, your car is exposed to UV damage, contaminants, and baked-in water spots. Plus, the paint becomes more vulnerable to scratches and other blemishes. So, washing alone isn’t enough—waxing is the secret sauce for keeping your ride looking sharp and protected.
How long does a car wax last?
The longevity of car wax can vary depending on several factors, including the type of car wax used, environmental conditions, and how often the car is washed.
How often should I wax my car?
Generally here are the timelines to expect:
Spray Wax: Typically lasts about 1-2 months.
Liquid Wax: Generally lasts about 2-4 months.
Paste Wax: Can last 3-6 months or longer, depending on the specific product and conditions.
Should I wax my car when it's wet or dry?
You should wax your car when it's completely dry. Waxing a wet car can lead to several issues such as streaking and uneven surfaces.
How long do I have to wait to wash my car after waxing?
After waxing your car, it's generally recommended to wait at least 24 hours before washing it. This allows the wax to fully cure and bond to the paint surface, ensuring maximum durability and protection.
How do I know if my car needs wax?
Water Beading Test
After washing your car, check out how the water behaves on the surface. If you see tight, round beads, your wax game is still strong. If the water sheets off or forms big, flat droplets, it’s time to re-up on that wax. No one wants a droopy paint job!
Dull Appearance
If your car’s paint is looking more blah than bling, the wax protective layer has taken a vacation. Time to give your ride a fresh coat and bring back that showroom shine!
Rough Surface
Gently run your hand over the paint after washing and drying. If it feels rough or gritty, those pesky contaminants have settled in, and your wax has worn off. Your car deserves a smooth touch, not a gritty handshake.
Increased Contaminant Build-Up
Noticing more dirt, bird bombs, tree sap, or other gunk sticking to your paint? That’s a telltale sign your protective wax layer has gone AWOL. Time to suit up and wax on!
Fading and Oxidation
If your paint is looking faded or rocking that chalky, cloudy vibe, your wax has waved the white flag, and your paint is crying out for protection. Time to step in and save the day with a fresh wax job!
How long should it take to wax my car?
An application of wax to your car, when done by hand, typically takes between one to two hours.
Do you wax before ceramic coating or can you ceramic coat over wax?
Yes, you can wax your car before applying a ceramic coating layer. You can either wax first and then apply the ceramic coating, or you can use a product that combines both wax and ceramic components. However, some recommend removing any leftover waxes, sealants or glazes with a product like Wipe Out Surface Cleanser before applying the ceramic coating.
Does clay bar remove wax?
Yes, when you clay bar your car it will remove any wax or other protective sealant due to the natural abrasion. So, clay bar first and then apply any wax or polish to protect your car.
Does temperature affect the waxing process?
The best temperature for waxing your car is between 60 to 80 degrees Fahrenheit. In this range, the wax remains liquid and is easy to apply. However, ensure the car surface isn't too hot, as the wax won't stick well. Think of it like the Goldilocks rule: not too cold, not too hot—just right.
Is it okay to wax my car in the sun?
While it's technically possible to wax your car in the sun, it's generally not recommended.